OEM Profile | OAuth Applications
The OAuth Application page lists authorized applications. The table listing on this page includes the following information:
- Application Name - the name of the OAuth application.
- Redirect URI - the address where the Cloud directs the user when the OAuth app is redirected.
- Actions - the option to edit the information for the application or delete it:
 To edit details for the OAuth application.
 To delete the OAuth application from the system.
From this page you can also do the following:
- On the OAuth Application page, click NEW OAUTH APP to open the Create New App dialog box. Following is an example of this button:

- Enter the information requested on the Details tab of the Create New App dialog box as follows:
- For Application Name, type a name for this OAuth application.
- For Company Name, type the name of the company that you wish to appear when signing in to the application.
- For Sign In Message (optional), type a short message that you wish to appear on the Sign In dialog box for the application.
- For Authorization Message (optional), type a short message that you wish to appear on the Authorization dialog box for the application.
- For Logo Image File, click UPLOAD FILE to locate image file, and then click Open to upload the file. This logo displays on the Sign In and Authorization dialog boxes for your OAuth application.
- For Redirect URI, copy the URI from the company’s developer console and paste in this field. This links the new OAuth application with company account for which this application is created. For example, for Amazon Alexa OAuth application, use the Amazon Redirect URL copied from the Amazon Developer Console.
- Click the Preview Sign In tab to review how your settings from the Details tab will look on the Sign In dialog box of the OAuth application. Following are the standard fields and options on the Sign In dialog box and how they are used:
- email address
When prompted in the company’s console (which is linked to the OEM Dashboard account), enter the same email address as your log-in credentials to the OEM Dashboard.
- password
When prompted in the company’s console (linked to the OEM Dashboard account), enter the same password as your log-in credentials for the OEM Dashboard.
- Sign In
Click Sign In when prompted in the company’s console (which is linked to the OEM Dashboard account), such as Amazon for Alexa.
- Forgot password?
- Click this link to open a view of this dialog box (shown below) to enter the"reset password" email.
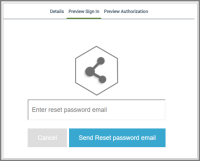
- On this dialog box, click Send Reset Password email. This sends an email with prompts to reset your password to the email address you entered as credentials for the OEM Dashboard.
- Click the Preview Authorization tab to how your settings from the Details tab will look on the Authorization dialog box of the OAuth application. Following are the options on this dialog box:
- Authorize
Click to enable the process to link your OEM Dashboard account to the third-party application (e.g., feature, property, etc.) for which you created the OAuth application.
- Deny
Click to deny access to your Ayla Customer Dashboard account.

- Click CREATE to save the details for this OAuth application, orCANCEL to close the dialog box without saving.
|
NOTE |
On successful creation of the new OAuth application, an Application ID and Application Secret is assigned to the app. |
- On the OAuth Application page, open the OAuth App dialog box by either:
- Clicking the OAuth application you wish to edit in the table listing.
- Clicking .
- Click EDIT.
- Edit the information on the Details tab as follows:
- For Application Name, type a new name for this OAuth application.
- For Company Name, type the name of the company that you wish to appear when signing in to the application.
- For Sign In Message (optional), edit, add, or delete the short message that you wish to appear on the Sign In dialog box for the application.
- For Authorization Message (optional), type a short message that you wish to appear on the Authorization dialog box for the application.
- For Logo Image File, click UPLOAD FILE to locate image file, and then click Open to upload the file to add a logo or replace the current logo. This logo displays on the Sign In and Authorization dialog boxes for your OAuth application.
- For Redirect URI, copy the URI from the company’s developer console and paste in this field. This links the new OAuth application with company account for which this application is created. For example, for Amazon Alexa OAuth application, use the Amazon Redirect URL copied from the Amazon Developer Console.
- Click the Preview Sign In tab to review how your settings from the Details tab will look on the Sign In dialog box of the OAuth application. Following are the standard fields and options on the Sign In dialog box and how they are used:
- email address
When prompted in the company’s console (which is linked to the OEM Dashboard account), enter the same email address as your log-in credentials to the OEM Dashboard.
- password
When prompted in the company’s console (linked to the OEM Dashboard account), enter the same password as your log-in credentials for the OEM Dashboard.
- Sign In
Click Sign In when prompted in the company’s console (which is linked to the OEM Dashboard account), such as Amazon for Alexa.
- Forgot password?
- Click this link to open a view of this dialog box (shown below) to enter the"reset password" email.
- On this dialog box, click Send Reset Password email. This sends an email with prompts to reset your password to the email address you entered as credentials for the OEM Dashboard.
- Click the Preview Authorization tab to how your settings from the Details tab will look on the Authorization dialog box of the OAuth application. Following are the options on this dialog box;
- Authorize
Click to enable the process to link your OEM Dashboard account to the third-party application (e.g., feature, property, etc.) for which you created the OAuth application.
- Deny
Click to deny access to your OEM Dashboard account.
- Click UPDATE to save the edited details for this OAuth application, or CANCEL to close the dialog box without saving.
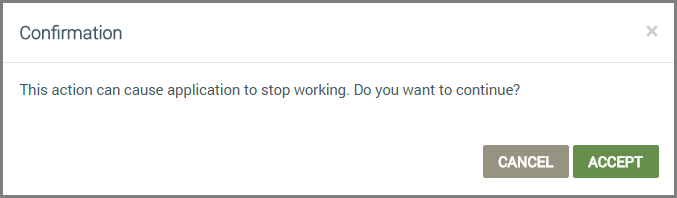
- On the OAuth Application page, click the Trash Can icon for the application you wish to remove:

- Click ACCEPT in the Confirmation dialog box:
How to get here on the dashboard: Click OEM Profile in the Navigation Panel on the left and then the OAuth Applications tab.
Please click here to let us know how we're doing. Thank you.